


When to replace pump parts: a guide for UK parents


Replacing breast pump parts on a regular schedule is the single most effective way to maintain suction strength, protect hygiene, and keep your milk output consistent. Small silicone parts like valves and membranes need regular replacement based on pumping frequency, while plastic components like flanges generally last longer but still require periodic replacement. The exact timing depends on how often you pump and which brand you use.
How often should you replace pump parts?
The pump parts replacement schedule below covers the six main component types. Usage frequency is the biggest variable: exclusive pumpers wear through parts faster than parents who pump once or twice a day.
- Valves and membranes (small silicone): generally require periodic replacement depending on usage
- Backflow protectors and diaphragms (large silicone): replace more frequently with heavier use
- Flanges and connectors (plastic): replace periodically or if damage is observed
- Tubing: inspect regularly; replace if contamination is detected
- Duckbill valves: replace as needed to maintain suction
- Breast shields: inspect regularly; replace based on condition and frequency of use
Hygiene and performance are both at stake. Worn silicone can harbour bacteria even after thorough cleaning, and a stretched valve reduces suction before any visible damage appears.
Replacement timings for each pump part type

Each component ages at a different rate, and knowing the specifics helps you plan ahead rather than react to a sudden drop in output.

Valves and membranes
These are the hardest-working parts in your kit. Every suction cycle flexes the silicone, and that repeated movement gradually reduces the seal. Replacing valves and membranes regularly helps prevent supply drops and maintain suction consistency. For exclusive pumpers, the shorter end of that range applies. Medela’s two-piece system (a yellow valve with a thin white membrane) is particularly vulnerable; the membrane is thin enough that a fingernail nick during assembly can break suction without leaving a visible mark.
Duckbill valves
Duckbill valves open and close with each cycle to draw milk into the bottle. If the slit no longer closes cleanly, air leaks in and suction can drop. Check the slit after each wash by holding the valve up to the light. If the edges no longer meet neatly, replace it before the next session.
Backflow protectors and diaphragms
These sit between the collection bottle and the tubing, keeping milk and moisture away from the pump motor. Replace backflow protectors periodically for regular pumpers, or sooner if you notice condensation in the tubing. On closed-system pumps like the Spectra S1 and S2, a failed backflow protector allows moisture into the motor housing, causing permanent suction loss.
Flanges and breast shields
Plastic flanges are more durable than silicone parts, but they still degrade. Yellowing or cloudiness inside the tunnel usually means the plastic is breaking down. Replace plastic flanges and breast shields periodically depending on pumping frequency. Proper flange fit also affects output directly; an incorrect size can mimic worn-part symptoms, so check sizing before ordering replacements.
Tubing
Tubing should always be dry and clear. Replace immediately if milk residue, mould, or cloudiness persists after cleaning. The CDC advises parents to inspect pump kits before each use and discard any tubing that shows mould.
| Part | Occasional use (1–3 sessions daily) | Heavy use (4+ sessions daily) |
|---|---|---|
| Duckbill valves | Replace periodically depending on use | |
| Valve membranes | Replace periodically depending on use | |
| Backflow protectors | Replace periodically depending on use | |
| Flanges / breast shields | Inspect regularly; replace as needed | |
| Tubing | Inspect regularly; replace as soon as moisture appears |
What the main pump brands recommend
Manufacturer guidance varies, and using the wrong parts for your specific model can cause seal failure or pump damage.
Spectra (S1, S2, S9, Synergy Gold): Uses one-piece duckbill valves. Replace duckbill valves every four weeks for exclusive pumpers (four or more sessions daily), and every 6–8 weeks for occasional use (1–2 sessions daily). Backflow protectors every 2–3 months.
- Medela (Pump In Style, Freestyle Flex, Symphony): The thin white membrane is the weak link. Check weekly by holding it to light; replace every 4–8 weeks, leaning towards four weeks for parents pumping more than four times daily.
- Motif: Follows broadly similar silicone replacement intervals. Consult the model-specific manual for connector and diaphragm guidance, as part configurations differ across the Luna and Aura ranges.
- Ameda: Uses a closed-system design with a CustomFit flange system. Silicone valves and diaphragms follow standard replacement intervals; Ameda recommends checking parts after every wash for signs of stretch or discolouration.
- Elvie (Elvie Pump, Elvie Stride): Wearable pumps pack components into smaller housings, so parts take more mechanical stress per cycle. Wearable pumps like Elvie require manufacturer OEM parts due to proprietary fit and tighter tolerances. Generic alternatives risk breaking the seal entirely. Elvie recommends checking valves after every 100 hours of use.
Proprietary designs are common across wearable and hospital-grade pumps. Using incompatible parts can cause seal failure and pump damage, so always match the part to the exact model. In the UK, some parents can access replacement parts through NHS maternity schemes or health visitor referrals; it is worth checking with your midwife or health visitor before purchasing.
Pro Tip: Keep your pump’s model number saved in your phone. When ordering pump spare parts online, searching by model number rather than brand name alone reduces the risk of ordering an incompatible part.
Signs your pump parts need replacing now
Some parts fail ahead of schedule. These are the warning signs to act on immediately rather than waiting for a calendar reminder.
- Reduced suction at the same setting: If you used to pump comfortably at level 5 and now need level 7 for the same result, the valve or membrane seal has weakened.
- Drop in milk output: A decrease in output with no other explanation (hydration, sleep, feeding demand) is often a parts problem. Swap valves first; it is the cheapest diagnostic step.
- Milk or moisture in the tubing: On a closed-system pump, this means the backflow protector has failed. Replace both the tubing and the protector.
- Visible cracks, yellowing, or warping: Any part that no longer sits flat or shows surface damage should be replaced before the next session.
- Persistent odour after washing: Silicone and plastic should smell neutral after cleaning. A sour or milky smell that survives sanitising means bacteria have colonised the surface.
- Longer sessions to reach the same output: If a 20-minute session is stretching to 30 minutes over several days, check the valve, membrane, flange fit, and tubing before raising the suction setting.
- Unusual pump sounds: A wheezier or clicking sound that was not there before usually means air is leaking through a worn seal.
A decrease in milk output or suction loss often signals worn pump parts even before visible damage appears. Do not adjust your pumping routine or assume a supply issue until you have ruled out part wear.
Maintaining pump performance through cleaning and timely replacement
Good cleaning habits extend part lifespan and reduce the risk of contamination between replacements.
- Disassemble every part that contacts breast milk before washing.
- Rinse parts soon after use, then wash in a clean basin or dishwasher where the manufacturer permits.
- Air dry fully on a clean surface before storing; never pack away damp parts.
- Handle thin silicone gently; do not pull hard on the tip of a duckbill valve.
- Use a soft brush on small creases rather than a rough scrubber.
- Sanitise using heat when needed, but note that frequent high-heat sanitising can age silicone parts faster.
- Replace any part that still smells, feels sticky, or shows a crack after washing.
The FDA advises against reusing pump parts between babies. Plastic and silicone degrade over time, and degradation affects both hygiene and performance in ways that are not always visible to the naked eye.
Pro Tip: Rotating two sets of pump parts reduces wear on each set and gives you a reliable backup. If one set suddenly performs worse, you have a clear signal before the next session rather than mid-pump.
How to safely replace each type of pump part
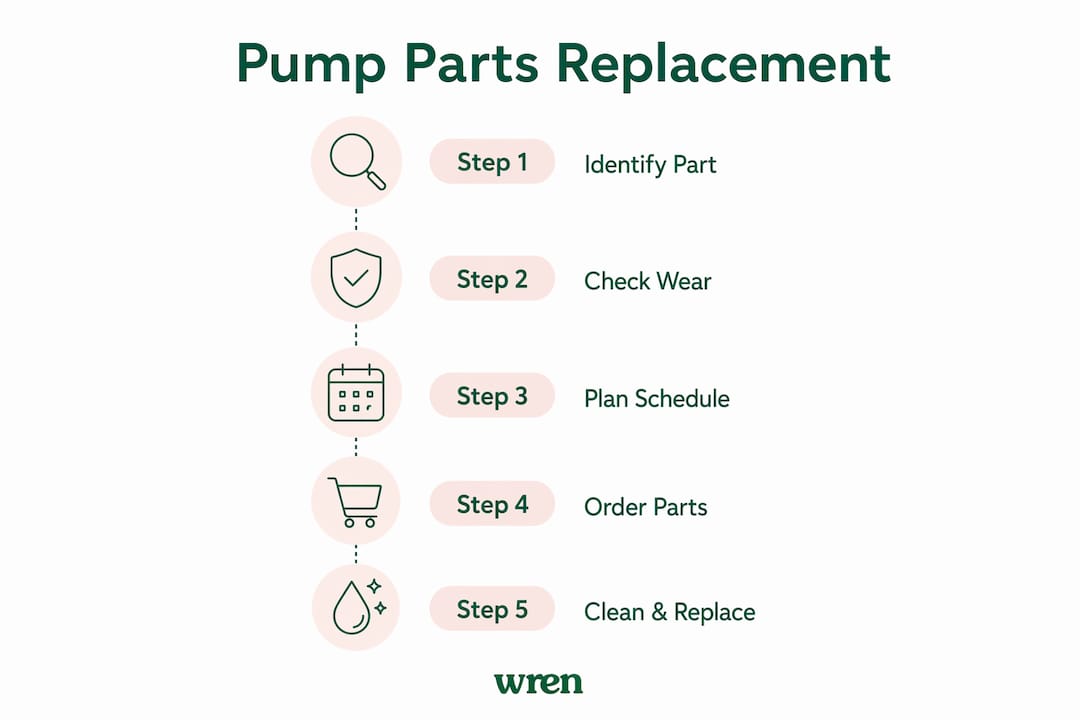
Replacing parts correctly takes only a few minutes once you know the process for each component type.
Valves and membranes
- Wash and dry your hands thoroughly.
- Remove the old valve or membrane from the connector or flange horn.
- Check the connector seat for any residue or cracks before fitting the new part.
- Press the new valve or membrane firmly into place until it sits flat with no gaps.
- Run a short test session to confirm suction feels consistent before a full pumping session.
Duckbill valves
- Pull the old duckbill straight off the connector; do not twist, as this can distort the connector seat.
- Inspect the connector for wear or residue.
- Push the new duckbill on firmly, aligning the flat side with the connector slot where applicable.
- Pinch the valve gently to confirm it closes cleanly.
Backflow protectors
- Disconnect the tubing from the pump body.
- Unscrew or unclip the backflow protector from the collection bottle connector.
- Discard the old unit; do not attempt to clean and reuse a failed protector.
- Attach the new protector, ensuring the silicone membrane inside faces the correct direction (consult your pump manual for orientation).
- Reconnect the tubing and check for a secure fit before switching the pump on.
Flanges and breast shields
- Remove the old flange from the connector and bottle assembly.
- Check your current nipple measurement before fitting the new flange; sizing can change over time, particularly in the early postpartum months.
- Attach the new flange to the connector, pressing firmly until the rim seats evenly.
- Confirm there is no wobble or gap at the connection point.
Tubing
- Disconnect both ends of the old tube from the pump body and the flange connector.
- Inspect the connector ports for moisture or residue and wipe dry.
- Attach the new tube, pressing each end firmly onto its port.
- Blow gently through the disconnected tube to confirm there are no blockages before reconnecting.
For a full walkthrough of pump assembly and care, the breast pumping guide from My-wren covers each step in detail.
How to clean parts before and after replacement
Cleaning the surrounding components when you replace pump parts prevents contamination from carrying over to the new parts.
Before fitting new parts Wash all connectors, bottle necks, and flange horns that the new part will contact. Use warm water and a dedicated washing-up brush; avoid abrasive sponges on silicone. Rinse thoroughly and air dry completely before assembly. Fitting a new valve onto a damp or residue-coated connector seat reduces its effective lifespan immediately.
After fitting new parts Run a short pumping cycle, then disassemble and rinse all parts again. This removes any manufacturing residue from new silicone components. For newborns or medically fragile babies, sterilise new parts before first use by steam sterilising or boiling for the duration specified in your pump manual. The CDC guidance on breast pump hygiene recommends washing parts after every use and sanitising at least once daily for parents of babies under two months or those born prematurely.
For detailed sterilisation steps specific to Wren pumps, the cleaning and sterilising guide covers the full process.
Where to buy authentic replacement parts in the UK
Authentic parts from the correct manufacturer are the only reliable option for maintaining pump performance and safety.
Manufacturer websites and authorised retailers are the safest source. Spectra, Medela, Ameda, and Elvie all sell replacement parts directly through their UK websites and through authorised stockists including John Lewis, Boots, and specialist baby retailers. Buying direct eliminates the risk of counterfeit or incompatible components.
Verify authenticity by checking:
- The part number matches your pump model exactly (found in your pump manual or on the manufacturer’s website)
- Packaging includes the manufacturer’s branding and a batch or lot number
- Silicone parts are odourless and uniformly coloured; discolouration or a chemical smell on new parts is a red flag
- The seller is listed as an authorised retailer on the manufacturer’s website
Generic or universal parts work acceptably for simple components like valves and membranes on standard electric pumps, where tolerances are less critical. For wearable pumps (Elvie, and similar proprietary designs), OEM parts are non-negotiable. A slightly off-spec valve in a wearable pump can break the seal entirely rather than just reducing efficiency.
Avoid marketplace listings from unknown third-party sellers, particularly for silicone parts. Counterfeit silicone may contain additives that are not food-safe, and there is no reliable way to verify material composition from a product photo.
My-wren’s pump motor and accessories are available directly, with parts designed to fit Wren’s wearable pump range precisely. For parents looking for practical gift ideas that support the pumping journey, this breastfeeding gift guide includes useful accessory recommendations.
What worn pump parts do to your milk output and supply
Using worn pump parts increases the risk of contamination and reduces milk output, directly affecting breastfeeding success. The mechanism is straightforward: a stretched valve no longer closes cleanly, air leaks into the suction pathway, and the pump removes milk less efficiently with each cycle. Output can look lower for the same reason a punctured straw delivers less liquid; the pump is still running, but the seal is gone.
The knock-on effects go further than a single session. Consistently incomplete milk removal signals the body to reduce supply over time. Parents who troubleshoot a supply drop by increasing pumping frequency, adjusting diet, or taking supplements often find the actual cause was a worn valve that cost a few pounds to replace. The FDA consumer guidance on breast pumps confirms that worn or damaged parts reduce pump effectiveness and create hygiene risks.
Hygiene deterioration is the less visible risk. Plastic parts develop microscopic cracks over time that harbour residue even after thorough washing. Silicone valves that have lost their surface integrity can retain bacteria between sessions. Neither issue is detectable by sight alone, which is why a proactive replacement schedule matters more than waiting for visible damage.
Key takeaways
Replacing pump parts on a proactive schedule, rather than waiting for visible damage, is the most reliable way to protect both milk output and hygiene.
| Point | Details |
|---|---|
| Small silicone parts wear fastest | Replace valves and membranes every 2–4 weeks for four or more daily sessions, every two months for occasional use. |
| Backflow protectors need regular checks | Replace every 1–3 months for frequent pumpers; a failed protector allows moisture into the pump motor permanently. |
| Plastic parts last longer but still degrade | Flanges and connectors last around six months but develop microscopic cracks that affect hygiene before visible damage appears. |
| Wearable pumps require OEM parts only | Elvie and similar proprietary designs need manufacturer parts; generic alternatives risk breaking the seal entirely. |
| Output drops are usually a parts problem | A decrease in milk output with no other explanation is the most common sign that valves or membranes need replacing. |


