


Easy steps to set up your Wren Breast Pump

Easy steps to set up your Wren breast pump
Just received your Wren pump? Here’s everything you need to set it up for the first time and it working right for you.
How to set up your breast pump
It won’t be long before you’re ready to pump! Just follow our simple set-up guide and you’ll be expressing yourself in no time. Here’s how:
Clean, sterilise and dry your breast pump WASHABLE parts

|
*NOTE this does not include the main pump motor |

|
Before the first use, clean, sterilise and dry all the removal parts Give all these parts a rinse in cold, clean water, followed by a proper wash in warm water with a mild washing-up liquid. Give it all another cold water rinse, then make sure everything is sterilised by either:
Let the whole lot air dry before assembling your pump, or use a clean, dry towel to daub them down. Please refer to our assembly guise to make sure you are putting it back together correctly. Forgetting just the smallest part can make all the difference. |
 |
 |
Charge it upMake sure your pump is fully charged before you get down to business. When the battery’s low, the leftmost indicator light will flash during use. Use the USB-C charging cable provided to connect the pump to a USB power adaptor (5V 2A) such as your phone plug. When charging, the indicator light will show and the pump won’t turn on. It takes around two hours to fully charge the battery. When the pump motor is fully charged, all five indicator lights will show, meaning you’ll be good to pump for up to two hours. *note. The pump does turn off automatically after 30 minutes. TIP: To check how much battery power is left in your pump, press and hold the'+' and'-' buttons together for two seconds when the motor is off. Each indicator that lights up represents around 20% of power remaining. Handy, eh? |
Assemble your breast pump


Putting your pump together is easy as pie.
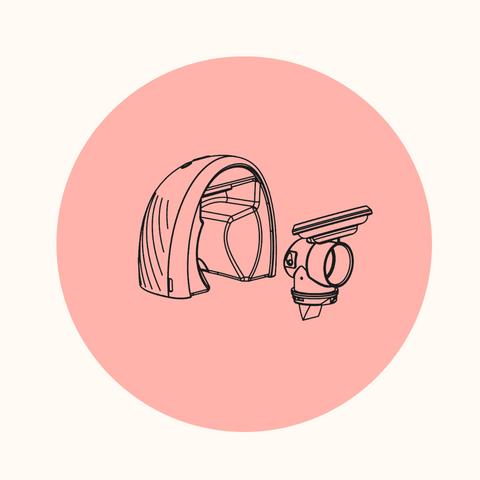
First, attach the diaphragm to the top of the connector unit.
Then, attach the seal ring to the bottom connector unit
Slot the valve into the connector unit, below the seal ring.
Push the assembled unit into the pump motor, making sure it’s attached securely and the diaphragm is pressed in tightly.
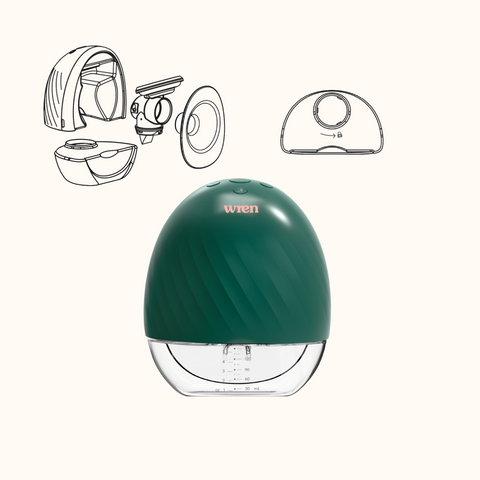
Twist the bottle onto the assembled pump motor in the direction of the arrow shown on the top of the bottle. Check it’s locked in securely and aligned with the pump motor.
Push the 25mm breast shield into the connector unit, making sure it's secure and flush with the pump.
Need to change the shield size? If the 25mm breast shield is too big for you, slot either the 21mm or 17mm adaptor into the breast shield duct.
Check out our guide to breast pump sizing to make sure you get a comfortable fit.


Get a good latch
Your Wren pump is designed to be worn in a standard nursing bra while sitting down or standing up.
The key to expressing successfully (and comfortably) is all in aligning your nipple in a well-fitting breast shield. When you're putting on the pump, try to align the duct in the direction your nipple is pointing (this can vary from day to day and woman to woman). Your nipple should be centred in the duct without touching the sides.

In order to 'latch on', the pump needs to be firmly but comfortably pressed against your breast, with no gaps between the pump and your skin.
Different bras offer different levels of support, so make sure you check the compression is right before each session. Use the nursing bra adjustor in your kit to create more space for the pump if needed. Simply attach the buckle to your bra and adjust the length to make sure everything’s feeling secure.

Start your session
Once the pump’s in position on your breast, long press the ‘power’ button to turn it on.
Short press the ‘power’ button if you need to pause pumping for any reason, and give it another short press to restart.
If the pause time exceeds five minutes, the pump will automatically turn itself off, and you’ll need to long press the ‘power’ button to start again.
Switch between modes
Every Wren pump has two modes: ‘stimulate’ and ‘express’.
When you switch the pump on it will automatically begin in ‘stimulate’ mode at the lowest suction setting, with the leftmost indicator lighting up. This mode has a fast pumping rhythm to stimulate milk let-down.
The pump will automatically switch to ‘express’ mode after two minutes. Alternatively, you can manually press the ‘mode’ button to begin expressing if your milk starts to flow earlier. This has a slower pumping rhythm for efficient expressing.
The pump has five levels of suction intensity, giving you control over what feels comfortable and works most efficiently in both ‘stimulate’ and ‘express’ modes. Once you can feel the suction on your nipple, use the ‘+’ and ‘-’ buttons to adjust the intensity until you find your preferred setting in each mode. The five indicator lights represent the five levels of intensity.
TIP: A higher level of suction intensity doesn’t always produce a higher volume of milk. Putting your nipple under excess stress can reduce milk production, so make sure you’re pumping at a comfortable level. If you don't feel any suction, stop and check that your pump is assembled and fitted correctly.
How to end your session
The pump will automatically switch off after working for 30 minutes but, if you’re done before then, long press the ‘power’ button to stop pumping and switch it off.
Unclip your bra and use your finger to break the seal around your nipple to avoid nipple pain. Remove the pump from your bra.
Store your milk
After you’ve finished your pumping session, twist the bottle to remove it from the pump motor.
While you can use a lid to store your milk in the bottle, we’d recommend decanting it into another sterilised container or one of our milk storage bags until you need it, so you can keep using the bottle with your pump. Find out more about how to store your milk in the fridge and freezer.
Keep it clean
Wondering how to clean your pump after use? Head to our guide on sterilising and caring for your Wren pump.
Do’s and donts
Finally, before you start using your pump, here are a few extra pointers that you may find useful.
- DO replace the washable components after long-term storage or before pumping for another child.
- DO ensure all pump components are completely dry before storage. Mould may develop on items that are stored wet or damp.
- DO keep out of reach of children. This pump contains small parts and a cable that may present a hazard.
- DO break the seal between the breast shield and your skin before removing the pump from your breast.
- DO contact your healthcare professional if you express minimal or no milk, or if expressing is painful.
- DON’T use your Wren pump while sleeping, lying down, or doing strenuous exercise.
- DON’T immerse the pump motor in water or other liquids. Keep it clean by wiping with a clean, damp cloth.
- DON’T place the pump motor in the fridge or freezer.
- DON’T pump through pain. If you’re feeling excessive discomfort or pain, try changing the intensity setting. If the sensation continues, gently break the seal between the breast shield and your skin and stop the session.
Looking for more advice on pumping and breastfeeding? Head to The Nest for tips and tricks to make your journey easier.


