


Wrong flange size: how to check and fix it fast


Stop pumping if it hurts. That is the first rule. A wrong flange size is one of the most common reasons breastfeeding mothers experience pain, nipple trauma, or lower milk output during expressing. The fix is usually straightforward: measure your nipple diameter, compare it to your current flange tunnel, and swap to the correct size or use an adapter.
Two problems cover most cases. If the flange is too small, your nipple rubs against the tunnel walls, causing pain, discolouration, or cracking. If it is too large, areolar tissue gets pulled into the tunnel alongside the nipple, creating a tugging sensation and post-pump swelling. Incorrect flange fit links directly to decreased milk yield and increased tissue damage.
Right now, if you suspect a fit problem:
- Stop the session or reduce suction to the lowest comfortable setting.
- Watch your nipple during the next cycle: does it move freely, or does it rub the tunnel walls?
- Check whether areolar tissue is being pulled into the tunnel with the nipple.
- If you have a spare flange or adaptor, try it at low suction for a short cycle.
- If you see cracking, bleeding, or severe discolouration, stop pumping and treat the nipple before resuming.
Correct flange fit improves both comfort and milk output. Cracking, bleeding, or signs of infection need prompt clinical attention, not another pump session.
Pro Tip: Reducing suction is not a long-term fix for a poorly fitting flange. It buys you time while you measure and order the right size.
Table of Contents
- What a flange is and why size affects your milk output
- How to measure your nipple and choose the right flange size
- Clear signs your flange is too small or too large
- Practical steps to fix a wrong flange size
- What to do if you are between flange sizes
- When to stop pumping and where to get help in the UK
- How Wren breast shield adaptors and shields address fit problems
- Key takeaways
- A note on getting the fit right
- My-wren adaptors and shields: where to order
What a flange is and why size affects your milk output
A flange (also called a breast shield) is the funnel-shaped cup that sits against your breast during pumping. Your nipple sits inside the narrow tunnel at the centre, and the pump draws it forward with each suction cycle. The tunnel diameter determines how freely the nipple can move, and that movement is what triggers milk ejection.
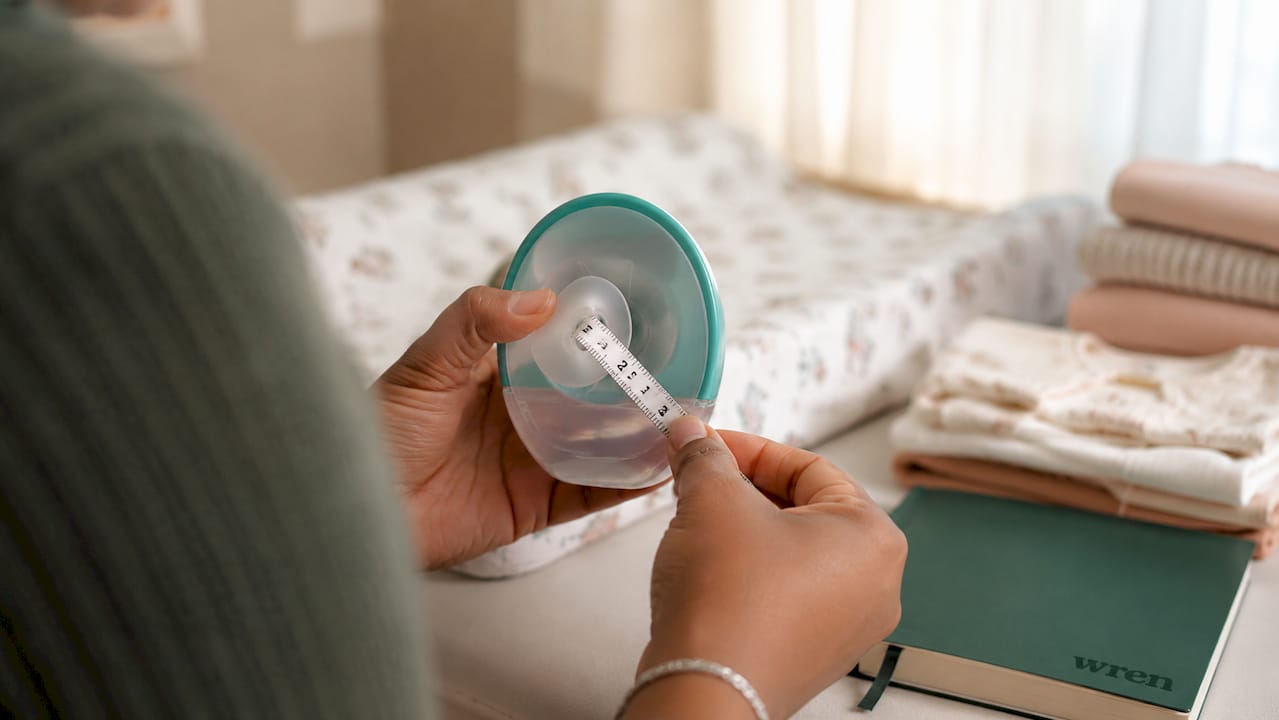
When the tunnel is the right size, the nipple moves axially (in and out) with each cycle, the areola stays flat against the flange rim, and milk flows efficiently. When the tunnel is wrong, either the nipple is compressed or the areola is pulled in, and both outcomes reduce the pressure differential that drives milk removal.
Key relationships to understand:
- Nipple diameter determines the minimum tunnel size you need.
- Areola position tells you whether the tunnel is too large.
- Suction seal depends on the flange rim sitting flush against the breast, with no gaps.
Pro Tip: A flange that fits at rest may not fit under suction. Always observe how your nipple and areola behave when the pump is actually running, not just when you place the flange against your breast.
How to measure your nipple and choose the right flange size
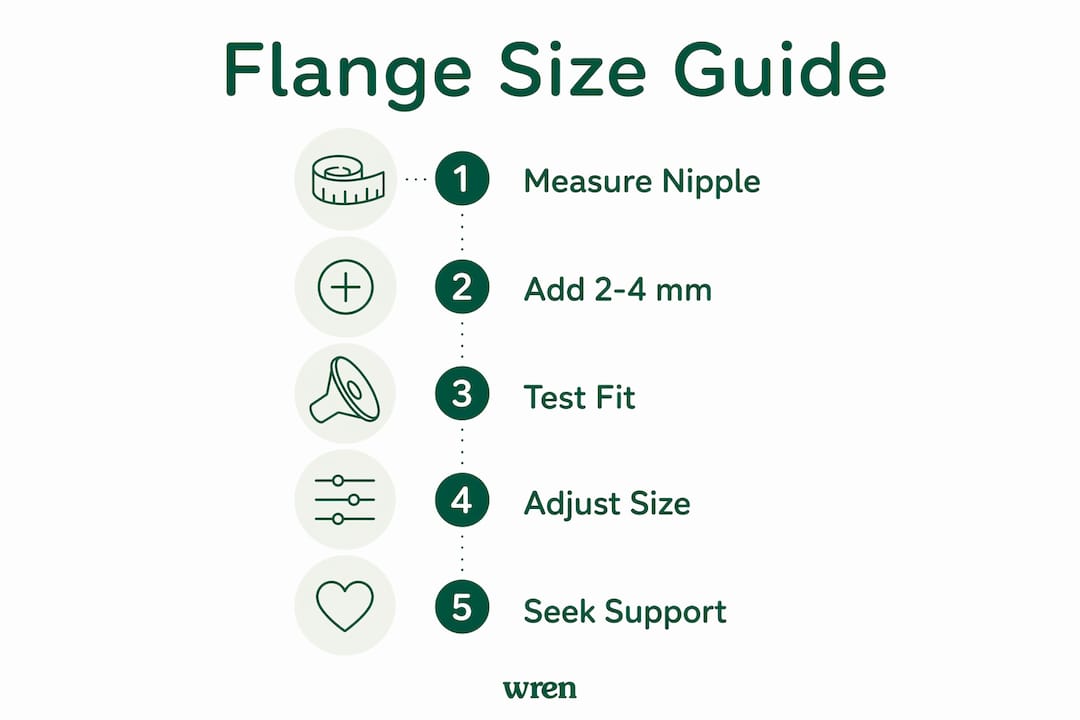
Measuring your nipple takes about two minutes and gives you a reliable starting point for selecting the correct flange.
Step-by-step measurement:
- Use a soft tape measure, a ruler, or a printable nipple gauge.
- Measure the diameter of your nipple at its base, not including the areola. Measure in millimetres.
- Do not measure when your nipple is inverted or immediately after feeding, as size can vary.
- Measure both breasts: they are often slightly different.
- Add 2–4 mm to your measured nipple diameter. That figure is your starting flange size.
- Run a short test cycle at low suction and observe fit under suction before committing to a size.
The 2–4 mm addition is a clinical guideline, not a guarantee. Individual comfort and milk output require testing.
Common flange sizes and tunnel increments:
| Nipple diameter (approx.) | Suggested flange size | Typical use case |
|---|---|---|
| small | small standard size | Smaller nipple diameter |
| medium | medium standard size | Average nipple diameter |
| large | large standard size | Larger nipple diameter |
Most breast shields increase in small increments, which is why many mothers fall between standard sizes. Re-measure after a few weeks: breast anatomy changes during the breastfeeding period, and a size that fitted well in the first month may not be correct at three months.
Pro Tip: Measure at different times of day. Nipple size can vary slightly with temperature, hydration, and how recently you last fed or pumped.
Clear signs your flange is too small or too large
Knowing which problem you have tells you which direction to move in size. Observing areola behaviour under suction is often more diagnostic than a resting measurement alone.
| Sign | Too small | Too large |
|---|---|---|
| Nipple movement | Restricted; rubs tunnel walls | Moves freely but areola also pulled in |
| Pain type | Pinching, rubbing, sharp pain | Tugging, pulling, dull ache |
| Visible tissue | Nipple pale, purple, or discoloured | Areola tissue visible inside tunnel |
| Gaps at rim | Rim sits flush | Gaps visible between flange and breast |
| Post-pump swelling | Nipple swollen or blistered | Areola swollen or sore after session |
| Milk output | Reduced; poor let-down | Reduced; inefficient removal |
Signs a flange is too small include nipple pain, visible cracks or blisters, a pale or purple ring around the nipple, and the nipple rubbing against the tunnel walls with no room to move. These symptoms indicate the tunnel is compressing the nipple rather than allowing it to draw forward freely.
Signs a flange is too large include areola being pulled into the tunnel alongside the nipple, visible gaps at the flange rim, a tugging sensation during suction, and areolar swelling or soreness after the session ends.
Pain during pumping is not normal. Persistent pain or visible skin trauma is a clear signal to change flange size or suction settings, and to consult lactation support if the problem does not resolve. Tolerating discomfort causes tissue damage and can reduce supply over time.
For nipple trauma or persistent low output, NHS and IBCLC guidance is clear: seek professional lactation support rather than continuing with a poorly fitting flange.
Practical steps to fix a wrong flange size
Work through these in order. Stop at the step that resolves the problem.
- Reduce suction immediately. Drop to the lowest comfortable setting. High suction with a wrong-sized flange accelerates tissue damage.
- Shorten your session. Use 10-minute cycles while you troubleshoot, rather than your normal session length.
- Try a different flange size. If you have a spare, swap it in and run a short test cycle at low suction.
- Use a silicone insert or adaptor. If your current flange is slightly too large, an insert reduces the tunnel diameter without replacing the whole shield.
- Test both sizes for output and comfort. Run one session with each and compare milk volume and pain level.
- Treat any nipple trauma before resuming. Apply a lanolin-based nipple balm or a hydrogel pad. Warm compresses before pumping can help with let-down. Allow the nipple to air-dry after each session.
Most mothers notice improvement in comfort within one to two sessions of switching to the correct size. Milk output often improves within a few days once the nipple is no longer compressed or the areola is no longer being pulled. Reviewing your pumping schedule alongside fit changes can also help restore supply more quickly.
Nipple care for mild trauma:
- Apply a thin layer of nipple balm or lanolin after each session.
- Use hydrogel pads between sessions for soothing relief.
- Avoid tight bras or fabrics that rub against damaged skin.
- If cracking is deep or bleeding persists, stop pumping and seek clinical advice.
Pro Tip: Test a new flange size with a short, low-suction cycle first. Observe the nipple and areola for the full cycle before deciding whether the size is correct.
What to do if you are between flange sizes
Falling between two standard sizes is common, given that most flanges increase in 3–4 mm increments. You have three practical options.
Option 1: Use a silicone insert inside the larger flange. A silicone reducer sits inside the tunnel and reduces the effective diameter by a few millimetres. This is the fastest and most cost-effective solution for most mothers. Silicone inserts are flexible, inexpensive, and widely available.
Option 2: Test both sizes and choose by feel. Run one session with the smaller size and one with the larger. The correct size allows free axial movement of the nipple without areola tissue being pulled in. Measurement gives you a starting point; comfort and output under suction give you the answer.
Option 3: Order a specialist reducer or adaptor. Some manufacturers offer intermediate sizes or adaptors that bridge standard increments. Check compatibility with your pump model before ordering.
The decision rule: favour free nipple movement and absence of areola pull over the number on the flange. A 21 mm flange with a silicone insert may fit better than a 17 mm flange even if your measured nipple diameter suggests the smaller size.
Pro Tip: After a week of testing with a new size or insert, re-measure and reassess. Nipple anatomy can change with regular expressing, and what fits at week one may need adjusting by week four.
When to stop pumping and where to get help in the UK
Some situations need clinical attention, not a self-managed size swap.
Stop pumping and seek help if you notice:
- Deep cracks or bleeding that do not improve after 24–48 hours of nipple care.
- Signs of infection: fever, spreading redness, warmth, or discharge from the nipple.
- Blocked ducts that do not resolve with massage or a lactation massager within 24 hours.
- Persistent severe pain that continues even at the lowest suction setting.
- Significant reduction in milk output that does not improve after correcting flange size.
UK resources:
- NHS: Your midwife, health visitor, or GP can refer you to infant feeding support. The NHS FITS guide from University Hospital Southampton covers flange fit in detail.
- IBCLC: An International Board Certified Lactation Consultant will assess flange fit, latch, and pumping technique. Find one via the LCGB (Lactation Consultants of Great Britain) directory.
- La Leche League UK: Offers peer support and can signpost to local IBCLC services.
- NHS 111: Call 111 if you have signs of infection or mastitis that need urgent assessment.
A virtual IBCLC consult can often resolve flange fit questions without an in-person visit. Expect the consultant to ask about your current flange size, pump settings, session frequency, and nipple symptoms. For nipple sensitivity and skin recovery, midwife and lactation consultant guidance on gentle care and recovery is worth reading alongside clinical support.
This article is general information, not professional medical advice. For nipple trauma, infection, or persistent supply concerns, confirm current guidance with an NHS professional or qualified IBCLC for your own situation.
How Wren breast shield adaptors and shields address fit problems
My-wren offers three specific products that map directly to the measurement and troubleshooting steps above. Each is designed for use with Wren wearable pumps; check compatibility with your pump model before ordering.
| Product | Tunnel size | Best for |
|---|---|---|
| Breast Shield Adaptor 17mm | 17 mm | Smaller nipple diameters; nipple measures 13 mm |
| Breast Shield Adaptor 21mm | 21 mm | Average nipple diameters; nipple measures 17 mm |
| Breast Shield 25mm | 25 mm | Larger nipple diameters; nipple measures 21 mm; also useful when a 21 mm pulls in areola |
Choosing between an adaptor and a replacement shield:
- Use an adaptor when your existing shield body fits the pump correctly but the tunnel diameter is wrong. Adaptors are a lower-cost way to change tunnel size without replacing the full shield.
- Use a replacement shield (such as the 25 mm) when you need a larger tunnel and a fresh shield body, or when your current shield shows wear.
Testing Wren parts safely:
- Start at the lowest suction setting for the first cycle.
- Run a short 5–10 minute test session before committing to a full expressing session.
- Observe areola behaviour throughout: it should remain flat against the rim, not pulled into the tunnel.
- Check nipple colour after the session. No discolouration means the fit is not compressing the nipple.
- Find full specifications on the Wren spare parts page.
Key takeaways
A wrong flange size is the most fixable cause of pumping pain and reduced milk output: measure your nipple, test under suction, and swap to the correct size or adaptor.
| Point | Details |
|---|---|
| Stop if it hurts | Reduce suction or end the session; pain is not normal and indicates a fit problem. |
| Measure before ordering | Measure nipple base diameter in mm, then add 2–4 mm to find your starting flange size. |
| Observe under suction | Static measurement is a starting point; watch areola behaviour during a live pump cycle to confirm fit. |
| Use inserts between sizes | Silicone inserts inside a larger flange are a fast, low-cost fix when you fall between standard sizes. |
| My-wren adaptors and shields | The 17 mm, 21 mm adaptors and 25 mm shield cover the most common size corrections for Wren pump users. |
A note on getting the fit right
Pain during pumping is not something to push through. In my experience reviewing the evidence and the guidance from NHS and IBCLC practitioners, the single most overlooked fix for low milk output is flange size, not suction power. Mothers often increase suction when output drops, which makes a poorly fitting flange worse, not better. The correct response is to reduce suction, measure the nipple, and test a different size.
Finding the right fit can take a session or two of observation. That is normal. What is not normal is persistent pain, discolouration, or cracking. If those symptoms appear, the flange is wrong and the nipple needs care before the next session.
My-wren’s range of adaptors and replacement shields exists precisely for this situation: a practical, low-cost way to correct tunnel diameter without replacing your entire pump setup. If you are unsure which size to order, the Wren sizing guide walks through compatibility step by step.
My-wren adaptors and shields: where to order
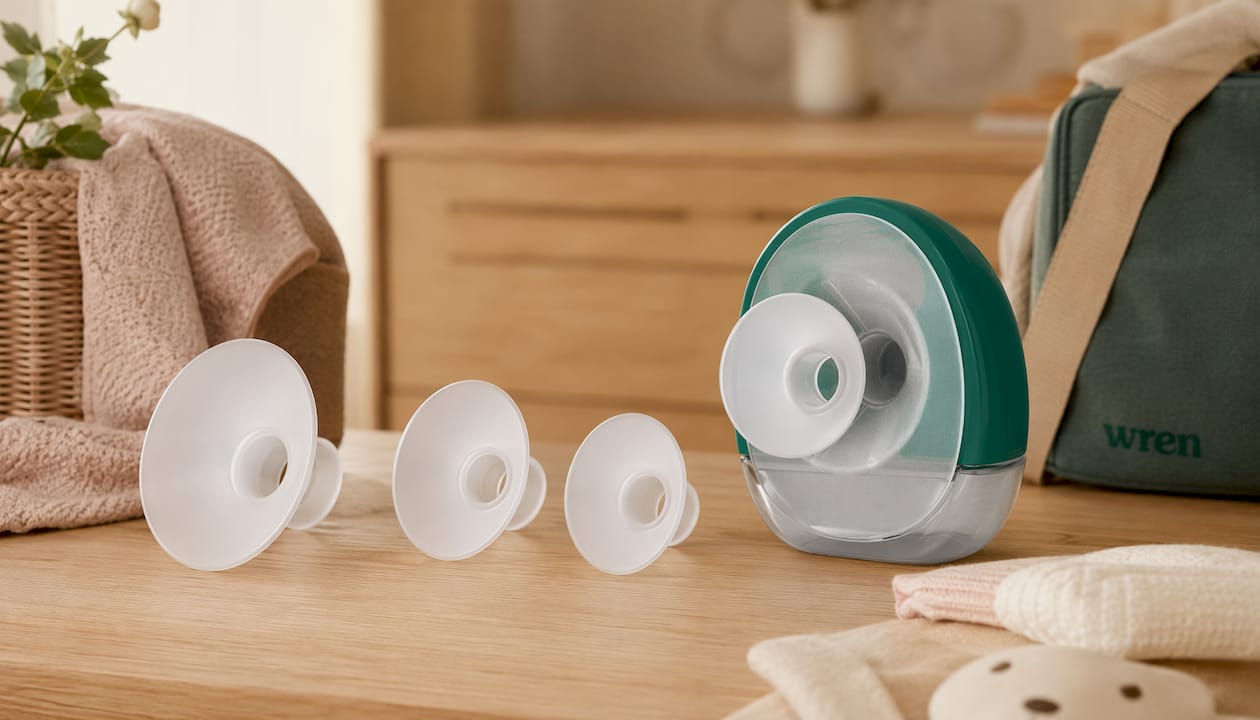
If your measurement points to a size correction, My-wren’s breast shield adaptors and replacement shields are available to order directly. The 17 mm adaptor, 21 mm adaptor, and 25 mm breast shield are all priced in £ and designed for Wren wearable pumps. Standard returns and contact policies apply; visit the My-wren website for current pricing and delivery options.
If you need nipple care products alongside a new flange, the breastfeeding accessories range includes nipple balms and other essentials to support recovery. Check the product pages for compatibility notes, or contact My-wren directly with your pump model if you are unsure which adaptor fits your setup.


