


Stop Wearable Pump Leaks in 10 Minutes for Breastfeeding Parents


Most wearable pump leaks come from one of three faults: an imperfect seal between the diaphragm and collector, a flange that no longer matches your fit, or overfilling combined with movement. Stop the session, keep the unit upright or tilt it forward, and empty the collector if it’s near the fill line. Re-seat every connection before you restart, and swap a worn valve if you’re carrying a spare. The full diagnostic steps below explain how to work out which fault is yours.
TL;DR:
- Proper flange sizing and fit are crucial, as a too small or too large flange causes seal failures and leaks during pumping sessions.
- Running static and dynamic seal tests helps identify whether leaks are due to worn parts or improper fit, guiding appropriate repairs or replacements.
- Storing the pump in a dry, cool, and separated state prevents warping and extends the lifespan of soft silicone components.
- The main worn parts that require regular replacement are valves, diaphragms, and sealing rings, typically every one to three months depending on usage.
- Most leaks occur from seal issues, flange mismatch, or posture during use, rather than manufacturing defects, with manufacturer support advising targeted troubleshooting.
Table of Contents
- Common causes of wearable pump leaking and where to look first
- How to stop a wearable pump leak during a session
- Static and dynamic seal tests: is it the parts or the fit?
- Flange fit: quick checks that fix most leaks
- Wearing, posture and bra fit for a better seal
- Consumables and how often to replace them
- My-wren’s checklist for a leak-free reassembly
- Storage and handling that protects your pump’s seal
- Signs of wear that go beyond the consumables
- Manufacturer advice and warranty considerations
- A note from My-wren on getting back to normal fast
- Wren products that help you stop leaks for good
- Manufacturer troubleshooting and maintenance resources
- Sources
- FAQ
Common causes of wearable pump leaking and where to look first
The location of the milk tells you almost everything. Match what you’re seeing to the list below before you start pulling the pump apart.
- Milk at the pour spout or splashing when you tilt usually means the collector is overfilled or you’ve moved suddenly while it’s near capacity.
- A wet rim between the flange and collector, or a slow drip from the join, points to a seal or assembly gap. Something isn’t seated properly.
- Nipple rub, the flange sliding, an odd rattling noise, or suction that drops off quickly all suggest a flange that no longer fits.
- A valve that doesn’t snap cleanly open and closed, or a diaphragm that won’t sit flush, means a worn silicone part is the culprit.
- Leaks that appear only when you recline, bend, or walk are a posture problem, not a parts problem. That’s backflow, not a broken seal.
Working through these five patterns first saves you from stripping down a perfectly good pump when the real issue is how you’re sitting.
How to stop a wearable pump leak during a session
- Pause the pump and keep the collector upright. Don’t tip it, and don’t carry on pumping into a unit that’s already compromised.
- Check the fill level before deciding what to do next. If milk is near the top, that’s your answer. If not, move to the seal.
- Remove the unit by leaning slightly forwards, letting any milk sitting in the cushion drain into the collector rather than spilling as you lift it away, a technique Philips Avent recommends for exactly this scenario.
- Pour slowly and at an angle, rather than disassembling the pump while it’s still full. Milk in a full collector is easy to lose the moment you separate parts.
- Re-seat everything before restarting. Line up every marking, press each part home, and listen or look for the seal clicking into place.
- Swap the valve or diaphragm if it looks warped or won’t seat, rather than reassembling the same faulty part and hoping. If you don’t have a spare to hand, stop the session and clean thoroughly before trying again.
Static and dynamic seal tests: is it the parts or the fit?
Running both tests takes ten minutes and tells you exactly what to fix.
- Static test: assemble the pump fully, add water to your usual pumping volume, wipe the outer surfaces dry, then leave it on a flat surface for 10 minutes. Momcozy’s support guidance recommends this exact method to separate assembly faults from wearing faults.
- Dynamic test: empty the collector, wear the pump as normal, and run a short cycle to see whether the leak only appears with motion or once there’s real flow.
- Static fails: look for hairline cracks, a warped rim, or a diaphragm sitting slightly off its groove. This is a parts problem.
- Static passes but dynamic fails: the fault is almost certainly fit, bra support, or posture, not the pump itself.
- A failed static test isn’t something more cleaning fixes. If water escapes while the pump sits still on a flat surface, replace the part rather than repeating the wash cycle.
Flange fit: quick checks that fix most leaks
A flange that no longer matches your shape breaks the seal every time, no matter how well the rest is assembled. Check that your nipple moves freely in the tunnel without dragging on the sides, and that only a small, even ring of areola is drawn in with it.
- Rubbing, pinching, or a nipple that looks squashed at the end of a session means the tunnel is too small.
- Excess areola pulled in, or a weak seal you can feel giving way, means it’s too large.
- A thin, temporary pad inside the flange can buy you one session while you sort a proper size, but it isn’t a long-term fix.
- Try one size up or down before assuming the pump itself is faulty. Our flange sizing guide walks through measuring and adjusting, and a lactation consultant can confirm fit if you’re still unsure.
Wearing, posture and bra fit for a better seal
Sitting or standing upright, rather than reclining, keeps milk flowing towards the collector instead of pooling against the seal and finding a way out. Momentary backflow when you lean back is one of the most common reasons a pump that tested fine on the bench still leaks in real use.
- A firm, well-fitted nursing bra holds the unit steady without pressing the flange out of alignment.
- A close-fitting nursing top avoids the wrinkled fabric that can nudge a flange loose under a looser layer.
- If you need to move around, pause and pour rather than wearing a full session on the move. A short stop beats an overflowing collector on the school run.
Consumables and how often to replace them
Three small parts do most of the sealing work, and they’re the first place to check when everything else looks fine.
- Valve or duckbill: replace it if it won’t snap fully open and shut, or looks cloudy and stiff.
- Diaphragm: replace if it’s dimpled, stretched, or sits slightly off its seat no matter how carefully you press it in.
- Sealing ring: replace if it’s lost its spring or feels tacky rather than smooth.
Manufacturer support guidance generally suggests replacing silicone accessories every one to three months depending on how often you pump, since repeated sterilising and dried milk residue can deform soft parts faster than wear alone. Harsh sterilising cycles are often the hidden cause of a part failing earlier than expected.
Pro Tip: Keep a small spares kit, one spare diaphragm and one valve set, in your changing bag. A technical review of suction failures found that worn soft parts are one of the most common causes of degraded performance, so a five-minute swap often solves what looks like a bigger fault.
My-wren’s checklist for a leak-free reassembly
Before every session, run through this quick sequence:
- Line up every marking on the diaphragm and container back rather than pressing parts together at a rough angle.
- Run a finger around the rim to check it sits flush all the way round, with no lifted edge.
- Wipe grooves and mating surfaces dry before assembly, since leftover moisture or residue stops parts from seating fully.
- Check the collector clicks or seats audibly, not just that it looks close.
Our step-by-step assembly guide covers each stage with photos, and genuine replacement parts are available directly through the brand if your spares kit needs restocking.
Storage and handling that protects your pump’s seal
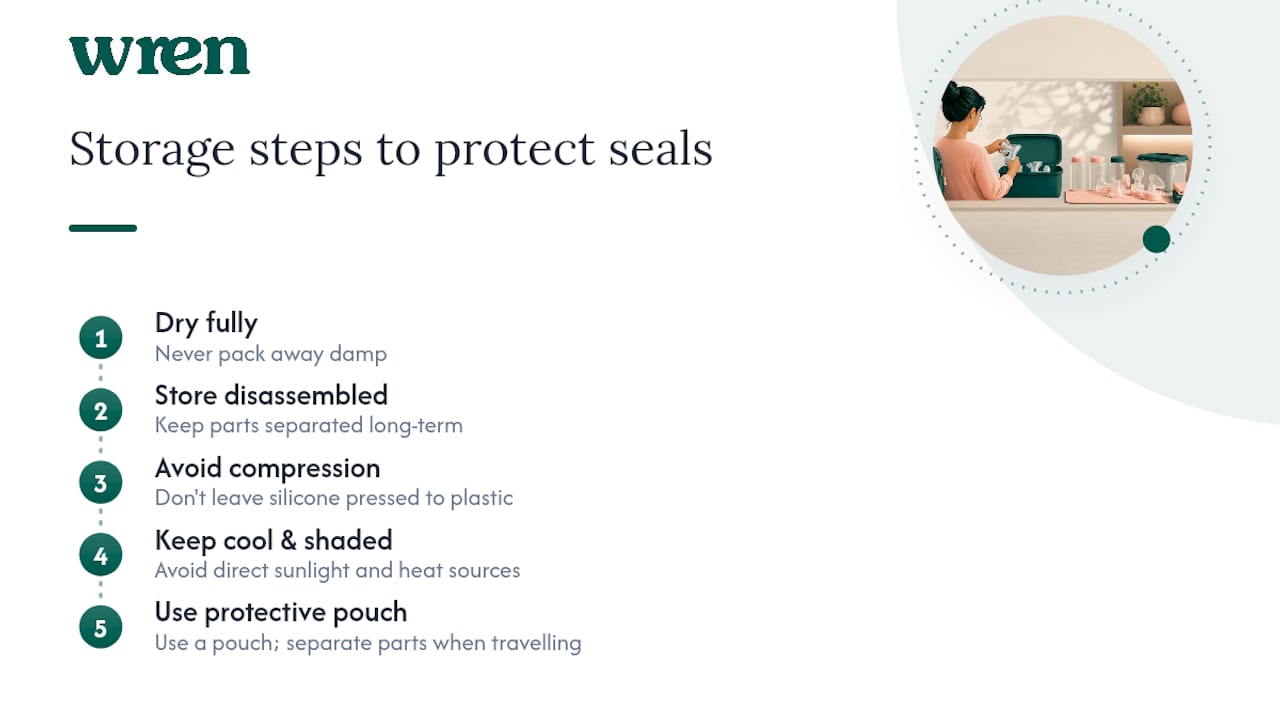
How you store a wearable pump between sessions matters almost as much as how you assemble it. Warm, damp storage is one of the quickest ways to shorten the life of soft silicone parts, and a squashed housing can warp a seal without you noticing until the next session leaks.
Store each pump fully dry, never packed away damp, since trapped moisture encourages the kind of residue that stops a diaphragm sitting flush. Separate the parts rather than storing them assembled for long periods. Silicone left compressed against plastic for days at a time can take on a slight set, which is enough to break a seal that tested perfectly a week earlier.
Keep components out of direct sunlight and away from anywhere they might sit against heat, a car dashboard or a windowsill are both surprisingly common culprits, since UV exposure and heat both accelerate the stiffening that eventually causes leaks.
A dedicated pouch or the original storage case protects against the housing getting knocked or dropped in a bag alongside keys and bottles. Small impacts rarely crack plastic outright, but repeated knocks weaken it over time in ways that only show up as a leak months later.
If you’re travelling, pack the pump with parts disassembled and slightly separated rather than jammed together. This avoids pressure points on the seals and gives everything a chance to dry fully between uses, which matters just as much on a two-day trip as it does at home.
Signs of wear that go beyond the consumables
Consumables like valves and diaphragms aren’t the only parts that fail. The plastic housing itself, the collector body, the motor unit casing, and the flange, can develop faults that no amount of reseating will fix.
Look for hairline cracks around the rim of the collector, particularly where it meets the flange thread. These are often invisible until you hold the part up to the light or run a fingernail lightly along the seam. A cracked housing will fail a static seal test every time, no matter how new your diaphragm is.
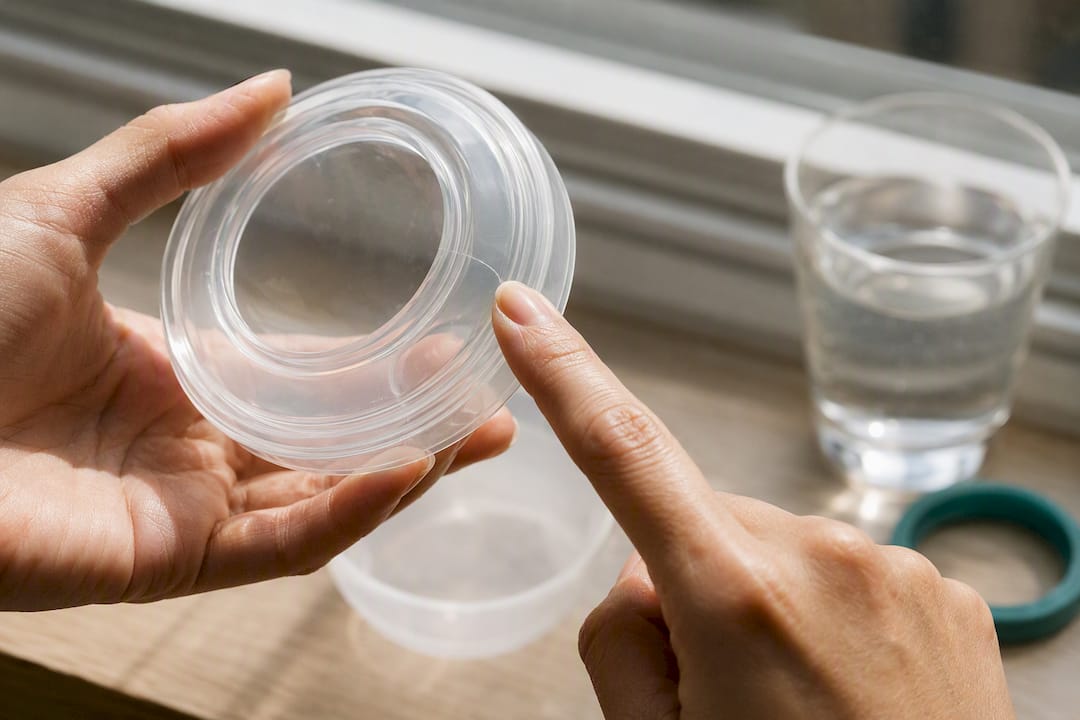
Check the flange for warping, especially if it’s ever been through a dishwasher’s hot cycle or left near a heat source. A flange that’s lost its true round shape won’t seat evenly against the collector, and the gap it leaves is often too subtle to see but easy to feel as a slow, persistent drip.
Listen for the motor unit itself. A pump that used to run quietly and now buzzes, rattles, or changes pitch partway through a session may be drawing air through a housing seam rather than through the intended airway. That’s a mechanical fault, not something a new valve will solve.
Any part that’s visibly discoloured, unusually flexible where it should be rigid, or doesn’t match the shape of a spare from the same set should be retired. Mixing a slightly warped part with new ones rarely restores a full seal.
Manufacturer advice and warranty considerations
Most pump manufacturers, and My-wren is no exception, expect a certain amount of consumable replacement as normal use rather than a fault covered under warranty. Valves, diaphragms, and seals are wear items, similar to how a kettle’s filter or a vacuum’s bag needs periodic swapping. A warranty typically covers the motor unit, housing defects, and manufacturing faults, not the natural softening of silicone after months of sterilising.
That distinction matters when you’re deciding whether to contact support or simply order a spare. If a brand-new pump fails a static seal test straight out of the box, that’s a legitimate warranty case worth raising with photos and a description of the test. If a two-month-old diaphragm has gone soft after daily sterilising, that’s a consumables replacement, not a fault.
Keep your proof of purchase and note the date you first noticed the leak, since most manufacturer support teams ask for both before troubleshooting further. If you’ve already run the static and dynamic tests described earlier, mention the results when you get in touch. It saves a round of questions and usually gets you to a resolution faster, whether that’s a replacement part or confirmation the pump itself needs looking at.
A note from My-wren on getting back to normal fast
A leaking pump is stressful, especially mid feed with a baby waiting. Most leaks are a quick fix, not a broken pump. Keep a small spares kit to hand, and if a leak persists after testing, get in touch with support and send photos so we can help pinpoint the cause.
— Paul
Wren products that help you stop leaks for good
If your pump keeps failing the static test no matter how carefully you reassemble it, sometimes the answer isn’t another spare part, it’s a pump built for a tighter, more consistent seal from the start. The Hands-Free Electric Breast Pump is designed around exactly the fit and seal issues covered above, and the Hands-Free Double Electric Breast Pumps give you the same reliability across both sides at once, useful if you’re currently juggling two single sessions and doubling your chances of a leak.
If blocked ducts or engorgement are adding to your discomfort between sessions, the Lactation Massager helps keep milk flowing more evenly, which can itself reduce the pressure and backflow that trigger leaks in the first place. A sensible spares kit for whatever pump you use should hold one spare diaphragm, one valve set, and a couple of sealing rings, with prices varying depending on the set. Browse the full range at My-wren and order replacement consumables before your current set starts letting you down.
Manufacturer troubleshooting and maintenance resources
For model-specific checks and parts diagrams, manufacturer support pages remain the most reliable starting point:
- eufy Support: Wearable Breast Pump S2 leaking
- March Pump: suction side issues, a technical look at suction mechanics for readers wanting the deeper engineering behind pump seals
Sources
- Why is my Wearable Breast Pump S2 leaking from the bottom of the collection cup during use? | eufy Support
- Suction side issues troubleshooting | March Pump
FAQ
Why are wearable pumps not recommended by some lactation consultants?
Some consultants raise concerns because wearable pumps rely on a smaller, snugger seal that’s more sensitive to flange fit and posture than traditional pumps, making leaks and reduced output more likely if the fit isn’t right. That’s a fit and technique issue rather than a reason to avoid wearable pumps altogether.
My wearable pump is leaking. What can I do to fix it?
Run a static seal test first, assemble it, fill with water, wipe it dry, and leave it on a flat surface for ten minutes to see if the leak is coming from the parts themselves, as Momcozy’s own troubleshooting guidance recommends. If it passes that test, the issue is more likely flange fit or posture during wear.
Which wearable breast pump doesn’t leak?
No pump is entirely leak-proof, but pumps that seal well tend to share consistent flange sizing options, replaceable diaphragms, and a snug collector fit. My-wren’s Hands-Free Electric Breast Pump is built around exactly that combination.
Why does my pump leak even after cleaning it?
Cleaning removes residue but won’t fix a warped diaphragm, a cracked rim, or a flange that no longer matches your shape. If leaks continue after a thorough clean, run the static seal test to work out whether it’s a parts fault or a fit fault, then check for hairline cracks in the housing.
How often should I replace the silicone parts on my pump?
Most manufacturer guidance suggests replacing valves, diaphragms, and seals every one to three months depending on how frequently you pump, since sterilising cycles and dried milk residue wear soft parts down faster than time alone.


